Intro.
When I first started developing websites , I had no clue what a ‘local development’ environment was. I would read about it all the time in forums and on stackoverflow. As far as I knew, developers around the world were purchasing domains and some space on a server, and developing sites and applications on a live site. Well, if you think about it this is neither ideal nor a reasonable way to work on a website. Imagine you have ‘x’ number of visitors on your site and you’re updating your code base. If a user clicks a link while you are uploading your new files, pages will not be loaded or displayed properly resulting in users leaving your site thinking it is either broken, or just ugly. This is where a ‘local development environment’ comes in to play. It allows for you to copy over your live site, or create a new site and work on it locally or even offline. From here you can work on the site, or give it a complete face-life and re-upload it back to your live site with out disrupting any visitors to the site. GREAT!
All of the website and servers files are contained on your hard drive. You can do everything you can on a live site, but on a local environment they are only accessible to the devices connected to your local network. I will be going in to detail and explaining how to set up a local development environment using XAMPP and then how to transfer your local site to a live server. Once we have XAMPP installed you can begin working on your site from scratch, or install a web platform such as WordPress, Drupal or Joomla ( or any other for that matter ). In this tutorial I will be working with XAMPP which will install up to date versions of Apache, PHP, MySQL, and MyPHPAdmin. Which is everything a web server from a host would provide contain. Lets get started with installing and setting up XAMPP. XAMPP comes in an asortment of ‘flavors’ so click the download link below and select which version to download to begin (dependent on which OS you are currently running). While you at it, grab a copy of the latest version of WordPress as well.
XAMPP: Download
WordPress: Download
Installing XAMPP
- *Tip*: It is extremely helpful to install XAMPP to a flash/thumb drive. This enables you to carry around your server and site files with you wherever you go. I use this technique when developing sites for work. I begin my development at work on a local server, and at the end of the day I can unplug my drive bring it home with me and continue working on the same project. It awesome.
- *Note*: I will be installing XAMPP on to my Windows machine. You can follow along and install the Mac version though, if you are using a Mac computer.
- To begin, save the ‘XAMPP Installer’ file, and the default WordPress files to the same folder on your desktop, or any other location you will remember.
- Once the two files have completed downloading, double click on the ‘XAMPP Installer’ file that you downloaded to begin. Click ‘Run’ if asked. You will be presented with a window asking you to select the language you would like to use. Go ahead and select the appropriate language and click ‘next’.
- The installer will now ask where you want to install XAMPP. This can be anywhere really (although you may encounter issues if you install it to C:\Program Files on ‘Windows Vista’). If you want to install it to your computer leave it at the default location (C:\XAMPP). But if you want to install it to your thumbdrive, select ‘Browse’ and direct the installer to your root thumb-drive location (ie: s:\). It will create a XAMPP folder in the directory when you select ‘install’. This is where all of your server files will reside. Click ‘next’.
- The ‘XAMPP Options Window’ will appear. In most situations it is fine to leave the XAMPP settings at default, but if you want to tweak them at all, feel free. Click ‘Install’.
- Finally, a window appears with a ‘congratulations’ message. It will also ask if you want to start the ‘XAMPP Control Panel’, select yes.
- You should now be presented with the ‘XAMPP Control Panel’ (as shown in image below). Here you have total control of starting and stopping your Apache and MySQL services (turning on/off your server). You need to turn these services on before you can access any of your sites on your local machine. To get to this screen in future direct yourself to the directory you installed the program to. Example: C:\XAMPP\xampp-control.exe
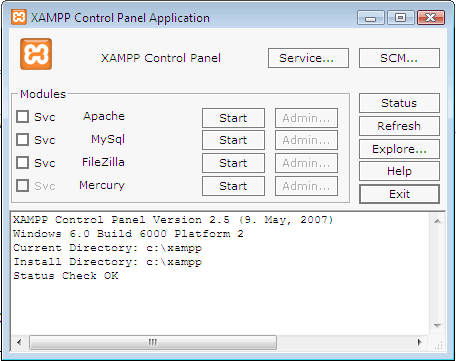
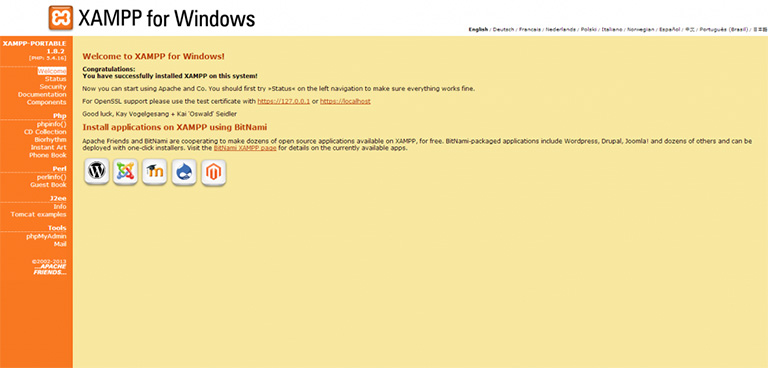
- Select ‘Start’ for the Apache and MySQL modules. If they turn green, things are running correctly. You may receive an error for Apache. This is a common problem when port 80 is being blocked. This is most commonly caused by starting up Skype (which is known to use port 80) before starting up Apache. If they have turned green, open a browser and type in to the URL browser bar at the top ‘localhost’ (without the quotes). You should see the XAMPP welcome screen, which should look very similar to the image below.

Thats it! XAMPP has now been successfully installed on to your computer, or portable flash drive. Great job! Now let’s see if we can get WordPress properly installed and running, so you can begin some serious development!
Installing WordPress to XAMPP
Now that we have XAMPP installed and successfully running lets move along and get WordPress properly installed and running on XAMPP. This is where things can get a little tricky, so follow a long closely!
- UnZip the WordPress file that you downloaded. (For me it is wordpress-3.6.zip) It should contain one folder, named wordpress.
- Once the folder has successfully unzipped, you need to make a copy of this folders contents inside of your XAMPP root, inside the htdocs folder.
- Direct your self to the htdocs folder inside the root folder for XAMPP (example: C:\XAMPP\htdocs). This is the main folder that will hold all of your individual websites. For example, I have multiple folders inside my htdocs folder. Each folder is a separate site I have developed. Go ahead and create a folder, and give it an appropriate name such as ‘Test-Site’. (Tip: Make sure there are no spaces in the folder name, as this will only cause problems down the road)
- Once you have created the folder, copy all of the contents of the ‘wordpress’ folder in to the new folder you just created. Your ‘Test-Site’ folder should now contain all of the ‘wordpress’ folder contents. (ie: wp-admin folder, wp-content folder, wp-includes folder etc.)
- You may now test that XAMPP and WordPress are communicating properly. Open up your browser and type this URL in to the browser bar at the top: ‘localhost/test-site’ (without the quotes). If all has gone according to plan, you should be welcomed with a WordPress Error screen instructing you to create a wp-config.php file.
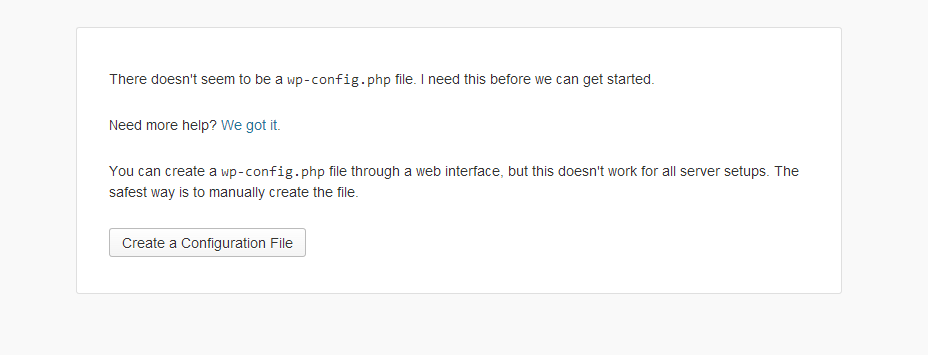
- Go ahead and create a config file by clicking the ‘Create a Configuration File’ button. You will be presented with a screen that lets you know the information you MUST KNOW before continuing (Example below). This screen is far more intimidating than it actually is. Next step is going to be creating the Database in ‘MySQL’.
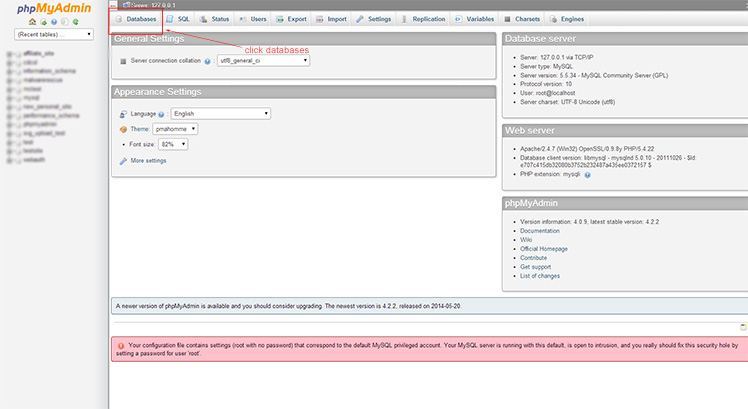
- Direct your browser back to ‘localhost’ (the XAMPP Homescreen) and on the bottom left of the screen you want to click on ‘phpMyAdmin’ underneath tools (Illustrated Below).
- From here you want to select ‘Databases’, the first menu item at the top of the screen. (Image below)
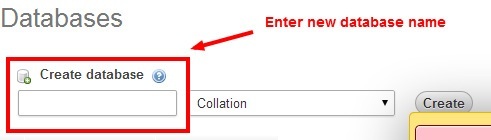
- After doing that, you need to create a new database for your new site. Do that by inputting a database name underneath ‘Create Database’ and click the ‘Create’ button. (Image below)
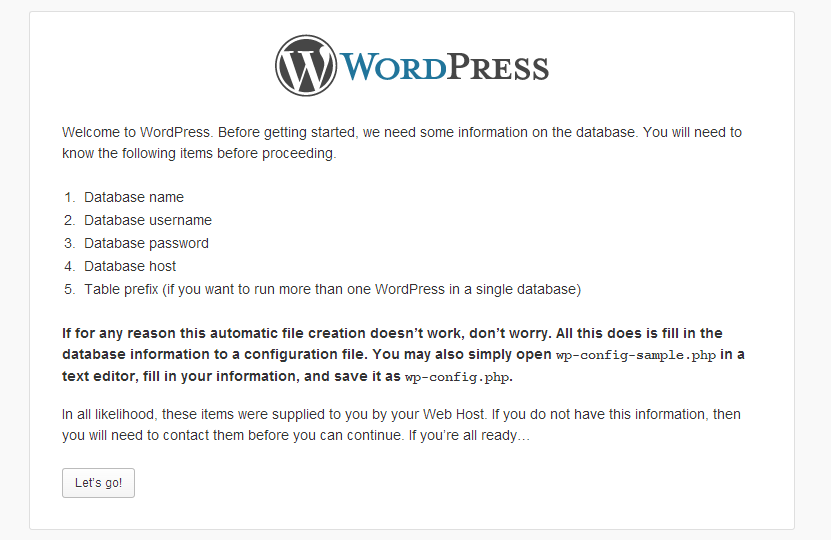
- Once you have created your database, you can now direct yourself back to your site. Enter in to the URL browser bar at the top ‘localhost/test-site‘ or whatever you named the folder inside of the htdocs folder. Go ahead and hti ‘Create a Configuration File’ which will bring you to a screen where you can click ‘Let’s Go!’, which will bring you to a page with text-input fields.
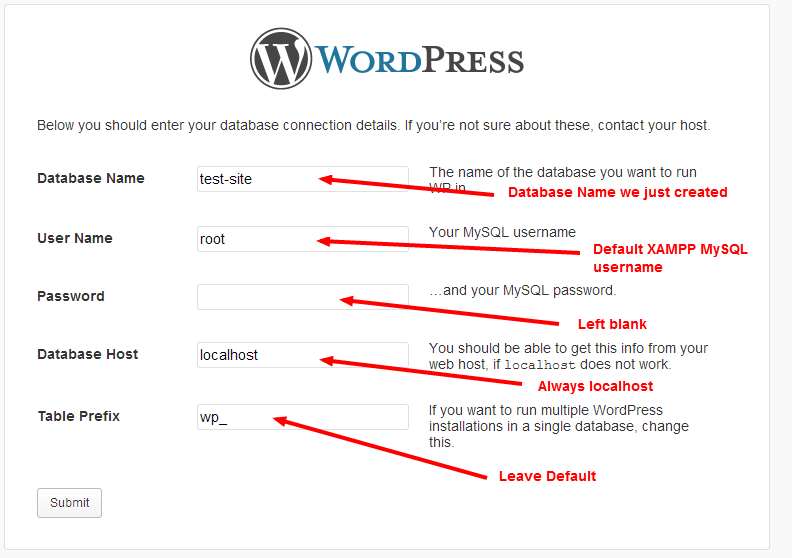
- On this screen you want to use the following settings, and then hit ‘Submit’ when everything is input correctly, and then hit ‘Run the Install’.:
Database Name: Database name you just created in Step #9.
User Name: Default username is ‘root’.
Password: Default password is blank.
Database Host: Always set to ‘localhost’.
Table Prefix: Leave default as ‘wp_’.
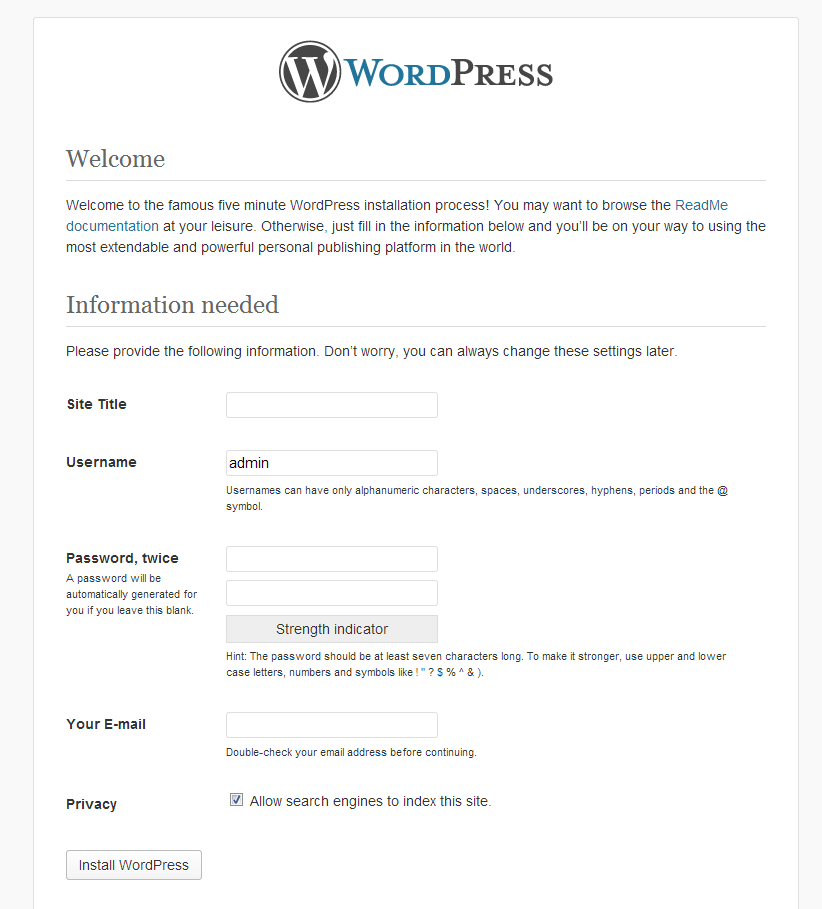
- If everything is set up correctly up to this point, you will be presented with a screen where you can input some basic settings for your WordPress site. Input all of your personal information, and click on ‘Install WordPress’ at the bottom of the screen.
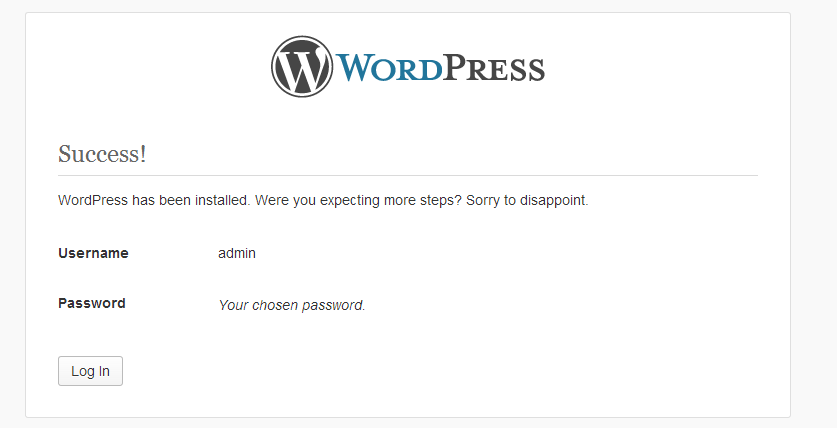
- If you have followed along to this point, and done everything correctly you will be presented with a ‘Success!’ screen, providing you your login user name, and the password you have chosen. You are now finished installing XAMPP and WordPress! Great Job! You can now work on and develop your site in a local environment (even with no internet!), before uploading it to a live production site.
- *Tip*: All the files you will need or are going to edit are going to be located inside of the htdocs folder in the XAMPP root directory. Your WordPress theme is located inside of XAMPP\htdocs\your-site\wp-content\themes\your-theme.
- *Tip*: To create a new site down the road, create a new folder inside of the htdocs folder and re-copy over the original WordPress installation files, and follow these installation steps again.
Migrate to Production Site
Coming Soon…