
resetting your password through phpMyAdmin
There are certain times when you will need to reset your password but you may not have access to the email that you originally used to set up the account. This has happened to me in the past when working on a localhost installation of a site, and then coming back to it weeks later only to realize I had forgotten my password. At the time, I was unable to reset and resend the password to myself via email because I hadn’t yet set up sendmail to function properly with XAMPP. (Check out the article on how to properly set that up here.)
Not being able to log in to your site at all is a very scary thing. But don’t panic just yet, there’s a very simple solution to this problem. I am going to walk you through the process of resetting your password through phpMyAdmin. If you’ve never used or heard of phpMyAdmin, basically it’s free software tool written in PHP that comes packaged with MySQL, intended to handle the administration of MySQL over the web through a GUI instead of a command line.
Here I will walk you through the process of resetting your password through phpMyAdmin.
Requirements:
- Access to host cPanel, Plesk, DirectAdmin etc.
How to Access phpMyAdmin
There are numerous ways you can access phpMyAdmin. Most hosting providers have some sort of GUI back-end set up for users. I run my site off of Bluehost and their servers come installed with cPanel. Go to your host providers website and login to your account. Once you have logged in locate the phpMyAdmin icon and click it.
Note: To access phpMyAdmin from a localhost installation you would need to hit the URL: http://localhost/phpMyAdmin or simply http://localhost and select phpMyAdmin on the left hand side from this screen. If using XAMPP and you haven’t set up the username and password, the default login for phpMyAdmin is
User: root
Pass: *leave empty*
This is what it looks like on Bluehost:

You may be asked to login. Your credentials should be the same as you used to login to your Hosting account.
You should now be on the phpMyAdmin screen, which will look very similar to this demo.
Once on the phpMyAdmin screen, you’re going to need to locate the database that your site is installed too (in that left hand column).
Tip: You can figure out what database your site is installed too by opening your wp_config.php file located in your sites root. Inside of wp_config.php (usually found at the top of the file) locate the line that looks like:
|
1 |
define('DB_NAME','your_database_name'); |
This is the line that tells WordPress and your site what database it should reference when storing and retrieving information. Your database name is going to be the second parameter, or where ‘your_database_name’ is.
Once you have selected the database you will be presented with all of the tables associated with that database. For your WordPress install (depending on the prefix you have chosen, it is set to wp_ by default) you will see tables such as wp_comments, wp_links, wp_options etc. Each table within the database holds a slew of information associated with some part of WordPress. The table we want is wp_users.
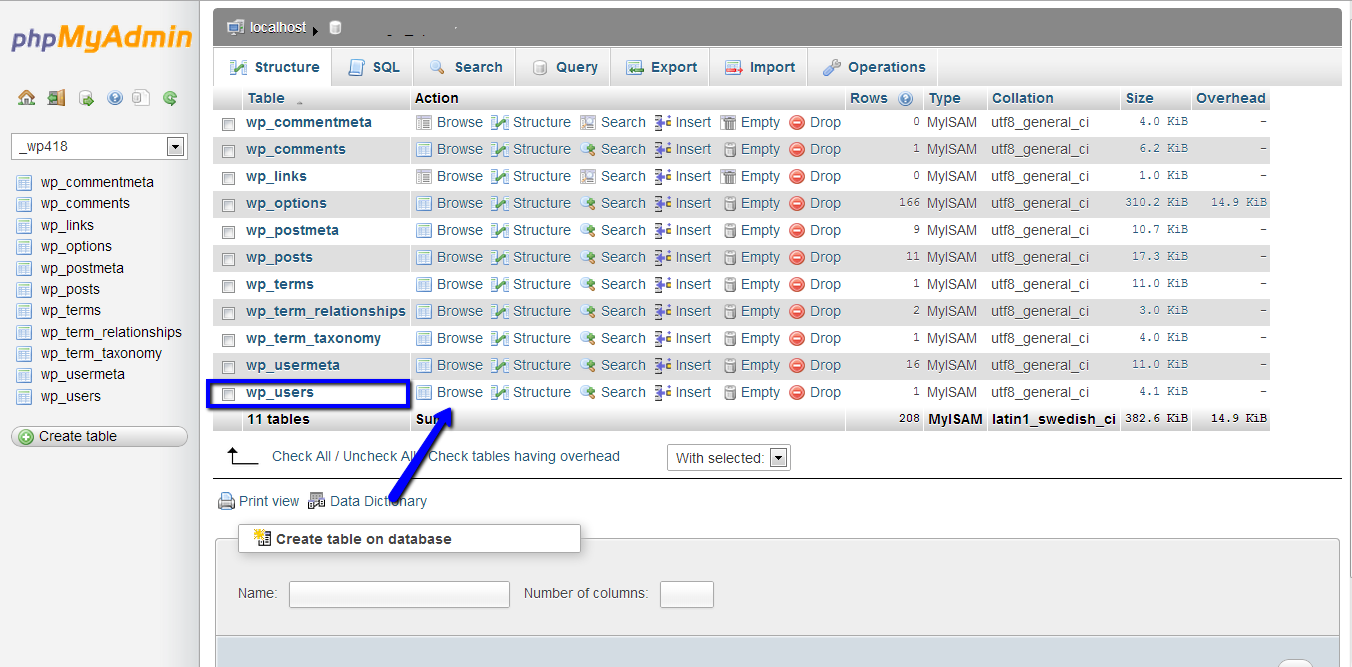
wp_users table and MD5 Hashing
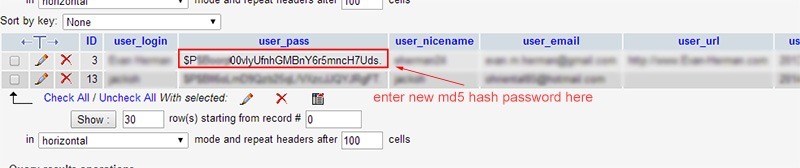
Click wp_users, and you will be presented with a list of all of the registered users on your site. Each column contains seperate information associated with the user. The user_login column , is the username you would use to login. The column for user_pass is a one-way MD5 hashed password, meaning it is encrypted using MD5 but it is unable to be decrypted (thus a one-way hash).
This means that you are unable to enter plain text into the user_pass field, but instead will have to hash the password yourself THEN add the hashed password into the user_pass field. Don’t panic! It sounds a whole lot worse than it really is. Luckily for us there are tons of MD5 hashing generators out there. An awesome MD5 hash generator that I have found and used with great results is
You enter your plain text password and the generator spits back a MD5 hashed password which you can then copy and paste right into the user_pass field in your database table.
For example, lets say your new password is going to be MySuperSecretPassword!5543 , just type that into the MD5 generator hit hash and you should get a return of something like:
c448bb02614c088ffabaa103b29ee1c7
Copy the MD5 hashed password string returned by the generator, then double click your old MD5 password next to the correct user, and paste the new MD5 hashed password string in.
Now access http://www.yoursite.com/wp-admin , and you should be able to login with the new password you just generated.
Finishing Up
There are a few steps one has to take to ensure a successful password change through phpMyAdmin, but once you understand the basics and have done it once or twice, this process should take no longer than 3 minutes. Its very straight forward and a very efficient way to swap out your password when you’ve forgotten a password and don’t have access to the email address used to sign up.